Because there was no C:\boot folder. This folder doesn’t exist as this computer (Windows 10) is UEFI based and not legacy based as I guess the gazillion guides out there assumed.
Due to the format change (legacy versus UEFI) this computer uses an EFI partition to store the boot files, but that partition doesn’t have a drive letter and the path to the BCD is different to all the guides out there, so how do you fix that ?
To find the efi partition, boot from the Windows installation disc, and select Install. Next click on Repair your computer then select ->Advanced Options ->Troubleshoot ->Command Prompt.
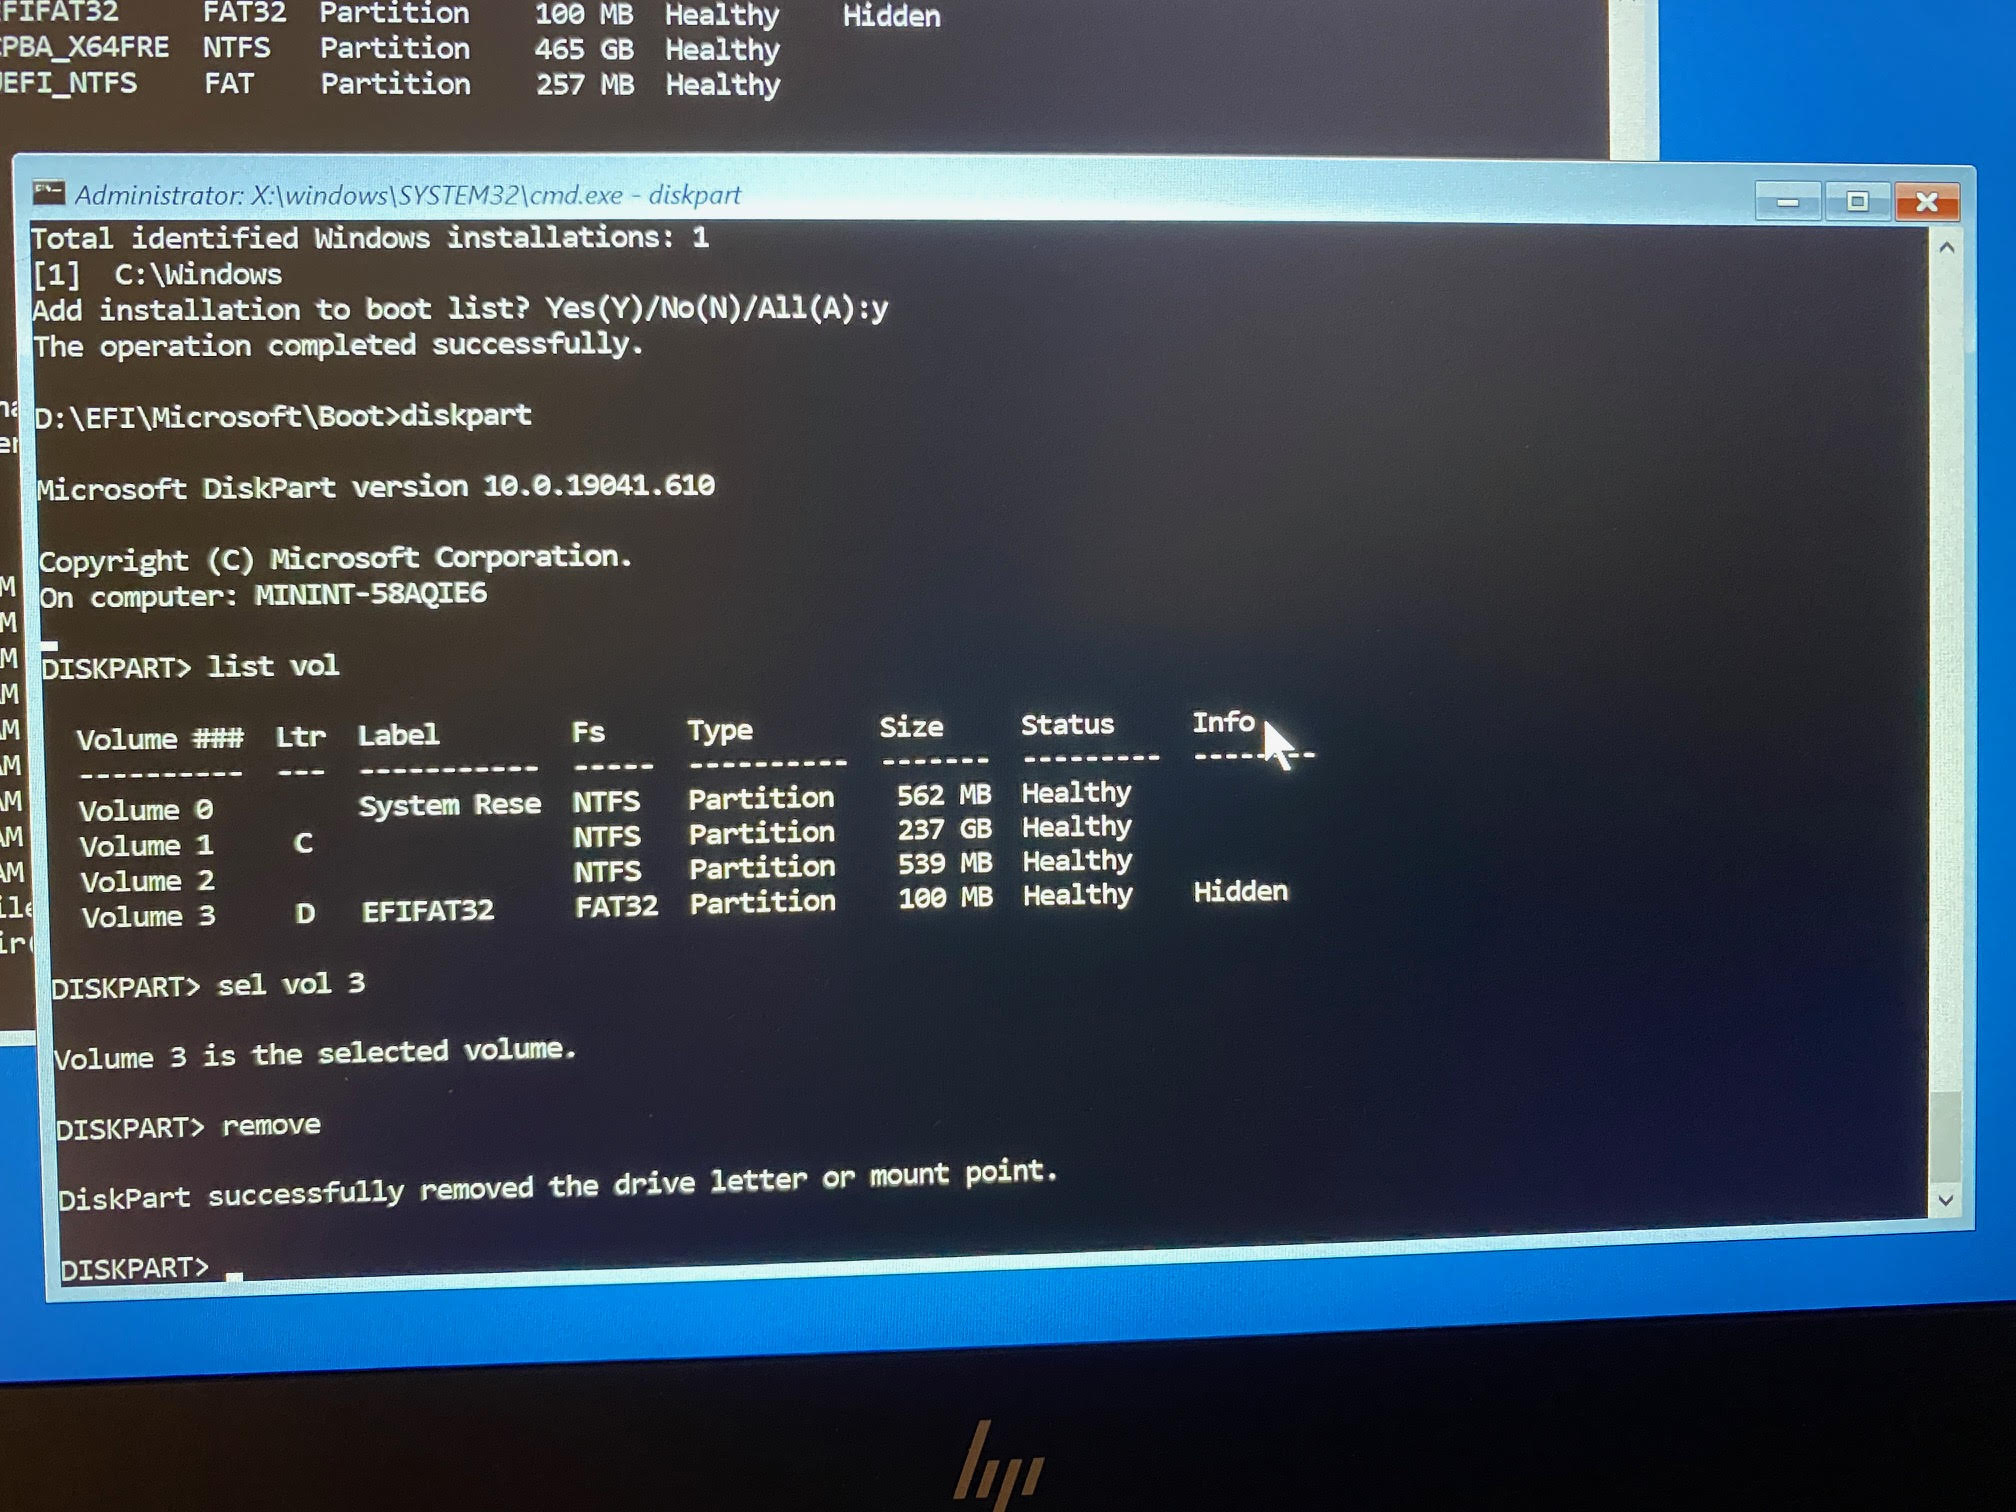
Once done, launch diskpart and then select the disk on your computer (most likely disk 0) like so
diskpart sel disk 0 list vol
that will show you the partitions on your computer. Then I selected each of the two SYSTEM partitions, and assigned a drive letter to them so I could view the files on them using
sel vol x (where x is the volume number)
assign
After assigning a drive letter and exiting diskpart I could browse to that drive in another command prompt by typing it’s drive letter, for example:
D:
and view the files on it using:
DIR
I did this a few times to identify the correct drive, after I was done with that drive I removed the drive letter in the diskpart command prompt using:
remove
Once I identified the EFI partition I navigated to where the bcd files were located using:
cd D:\EFI\Microsoft\Boot
and that path was D:\EFI\Microsoft\Boot as shown below, note your EFI partition may end up on a different drive letter using the ASSIGN command.
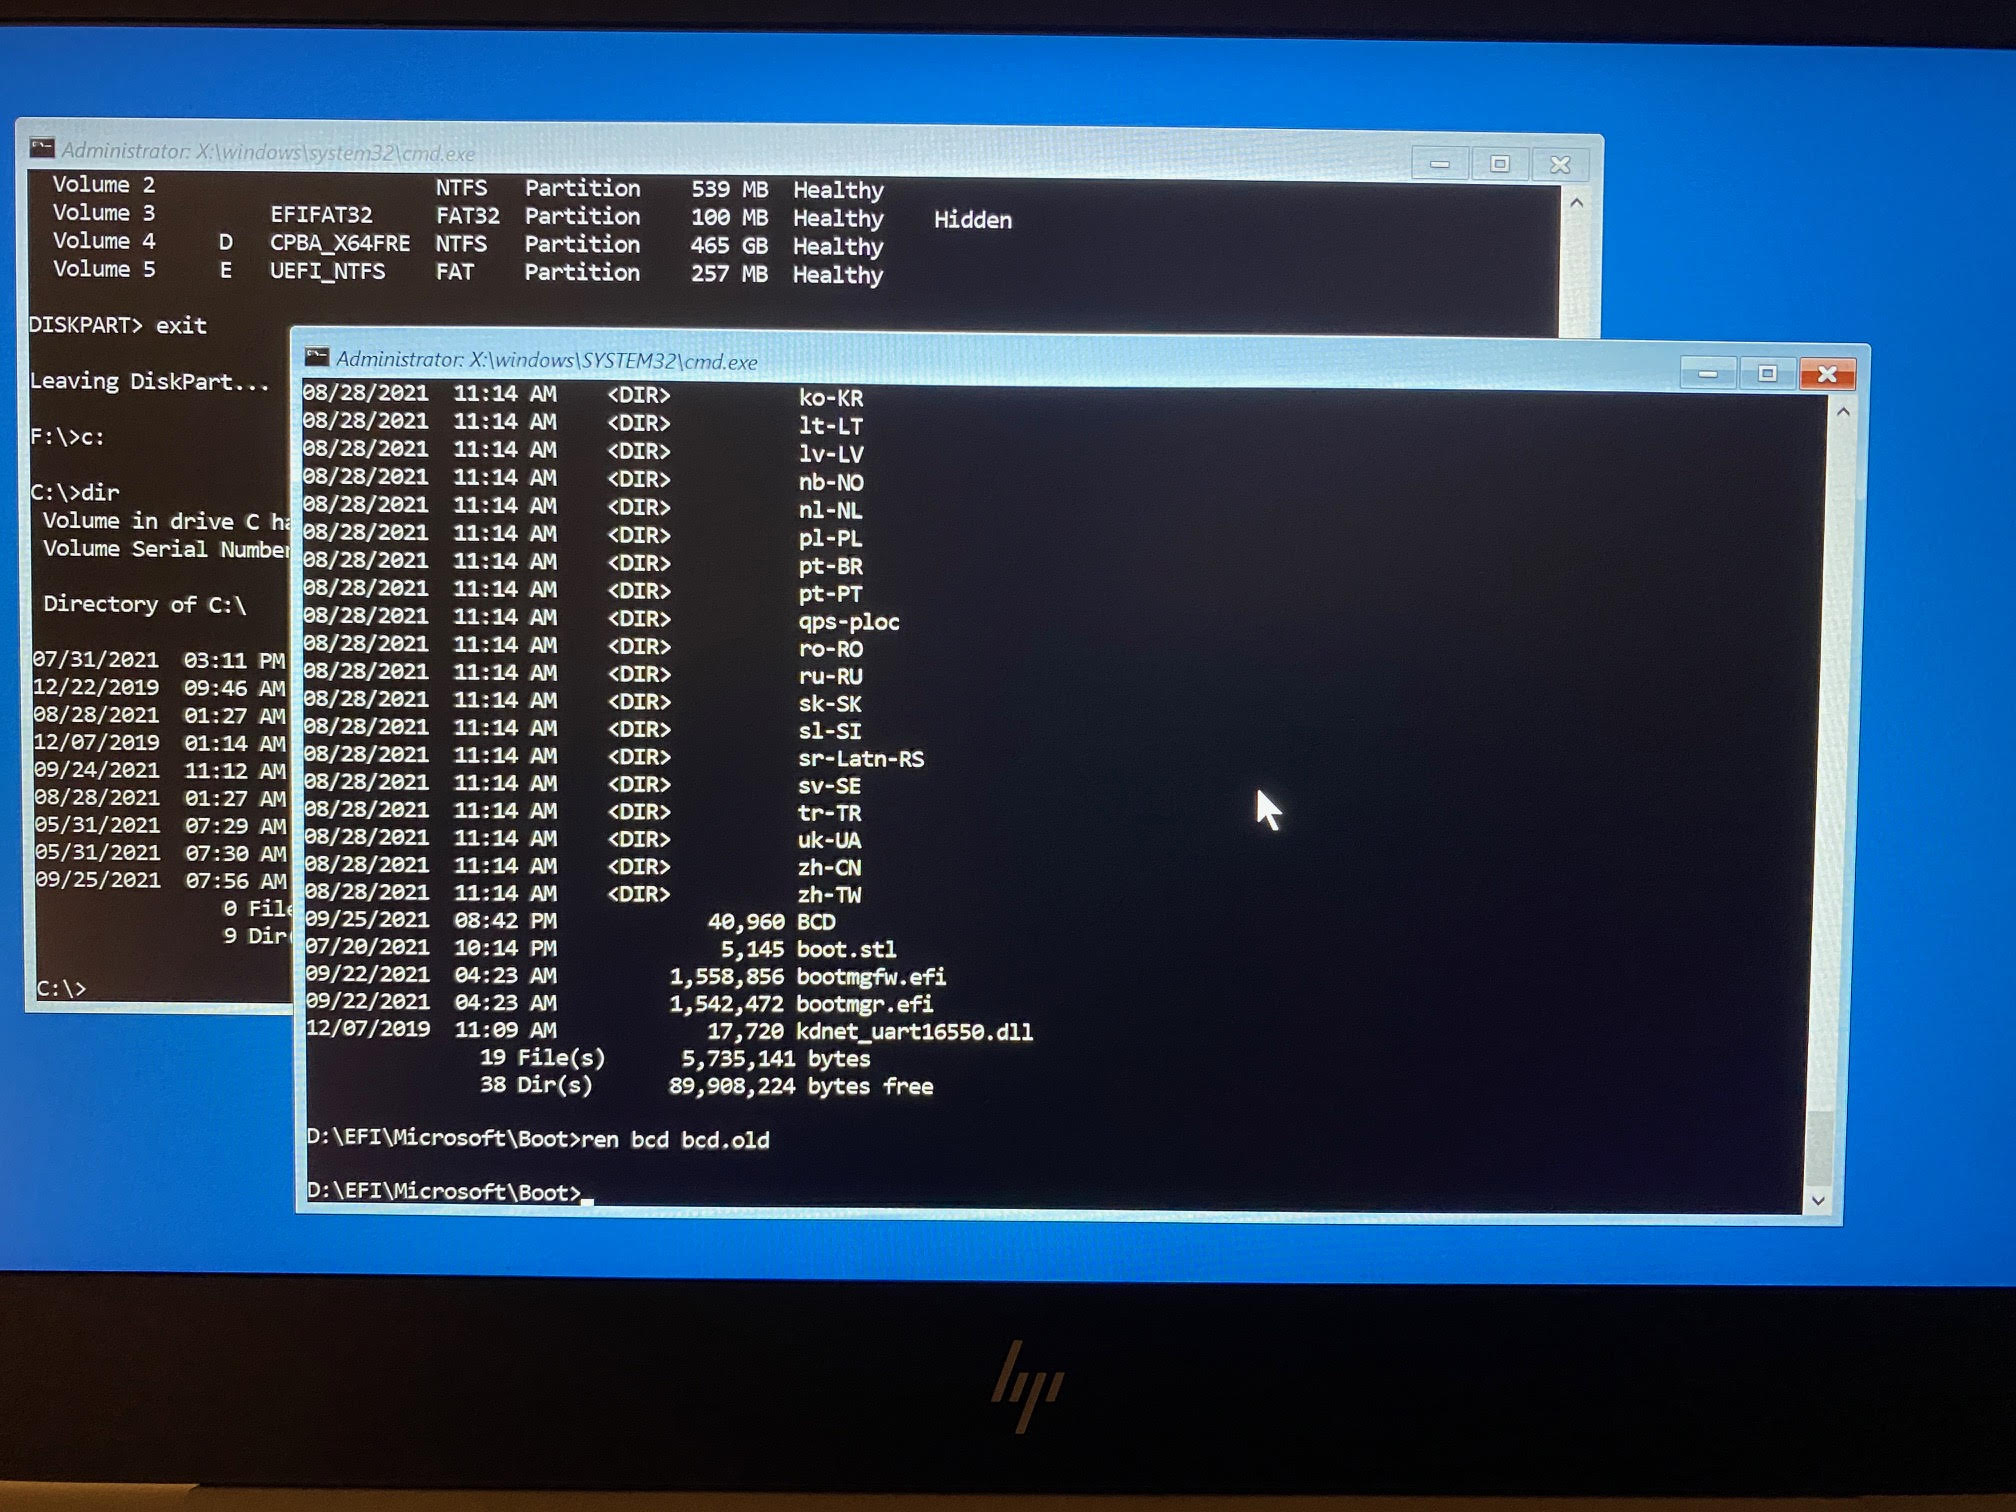 Now that I found the BCD, shown above, I removed the SYSTEM, READ ONLY and HIDDEN attributes from it before renaming it to bcd.old and then rebuilt the BCD.
attrib bcd -s -h -r ren bcd bcd.old bootrec /RebuildBcd
And that was it , all I had to do before rebooting was to un-assign the drive letter using the remove command.
 and finally, reboot the computer cleanly using
wpeutil reboot
Was this article helpful?
That’s Great!
Thank you for your feedback
Sorry! We couldn't be helpful
Thank you for your feedback
Feedback sent
We appreciate your effort and will try to fix the article